


A pricing calculator is a software tool used to determine the cost of a product or service based on various factors such as quantity, features, subscription duration, and any additional options or add-ons. It's an essential tool for businesses that offer subscription-based products or services, as it helps potential customers estimate their expenses and make informed purchasing decisions.
Nishant Mishra, Developer Advocate at DronaHQ, guides you through building and launching a powerful pricing calculator app built with DronaHQ effortlessly.
Pricing calculators can be used for a variety of products and services, including:
Subscription-based products, such as software as a service (SaaS) and platform as a service (PaaS)
One-time purchase products, such as physical goods and ebooks
Services, such as consulting and training
Low code is an approach to software development that simplifies the process by reducing the need for major FrontEnd coding. Low code tools can be used to build a pricing calculator for a subscription-based product by providing a visual interface for creating the calculator and pre-built components for calculating prices.
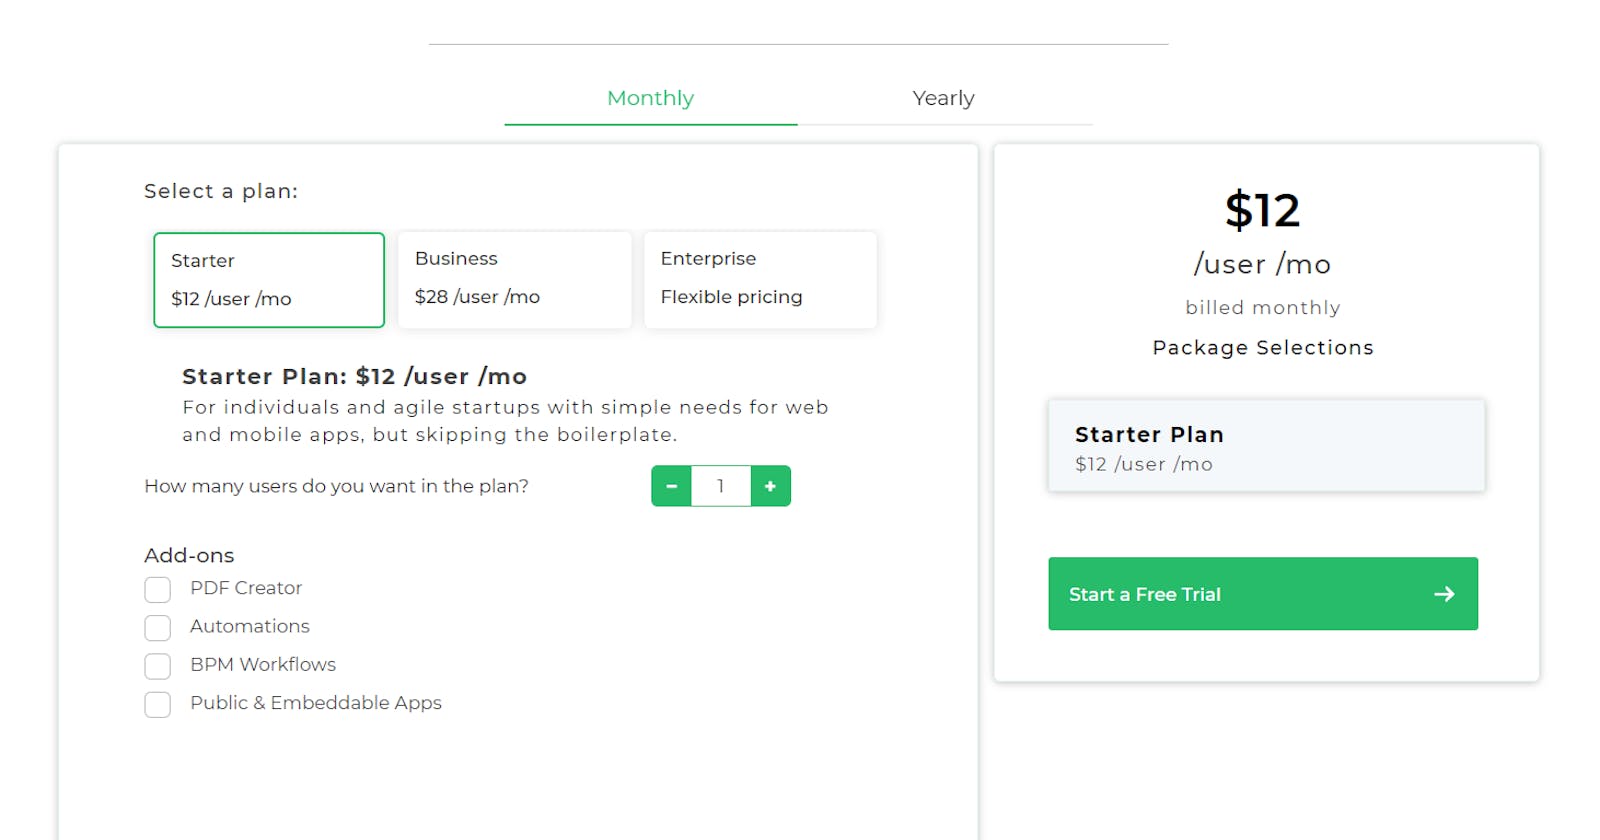
My aim was to quickly build a pricing calculator using a low code tool. It must have all the functionalities of a calculator, i.e. adding price according to the selections of the plans, the quantity and selected Add-ons and must also show different data for Monthly and Yearly Plans.
To make an app like this, I can use the most commonly used Front-End library - ReactJS.
If I try to make a layout of the app, I'll have to work with the UI and then add functionalities to it.
As mentioned above I'll have to make multiple functionalities for which if I use React, I’ll have to make React components and implement React Hooks and state management.
It is possible to make the app using React but it will take quite a time and be a tedious process to do so.
Building pricing calculator on ReactJS vs Low code
ReactJS | Low-Code Platform (DronaHQ) | |
Development Speed | Slower due to manual coding | Faster with visual development tools |
Customization | Highly customizable | Limited customization for specific needs |
Coding Expertise | Requires proficient coding skills | Minimal coding skills required |
Complexity | Suitable for complex, feature-rich apps | Ideal for simpler to moderately complex apps |
Learning Curve | Steeper learning curve | Lower learning curve, more accessible |
Rapid Prototyping | Time-consuming for initial prototypes | Quick prototyping and iteration |
Maintenance | May require more maintenance over time | Easier maintenance with visual components |
Scalability | Highly scalable for large applications | Scalable for smaller to mid-sized apps |
Let’s try something else!
Low code is an approach to software development that simplifies the process by reducing the need for major FrontEnd coding. Low code can be used to build business apps, mobile apps.
Like that, the pricing calculator is one of the apps that can be built with low code by providing a visual interface for creating the calculator and pre-built components for calculating prices such as price range, buttons, containers, or forms.
Instead of writing the whole code using React, I'll use a Low-Code tool - DronaHQ.
DronaHQ is a low-code application development platform that provides a visual interface for building apps, reducing the need for extensive hand-coding. As we don’t have to hand-code manually, this makes it accessible to both developers and non-developers, enabling faster application development.
To make the Price calculator application, we are going to make a UI and need to write logics for functionalities. DronaHQ comes here handy as the platform provides a wide range of pre-built components and templates that users can customize to suit their specific needs.
For adding functions to the UI, DronaHQ's Logic Builder is a visual tool that simplifies the process of defining application logic. One can create complex workflows, business rules, and data integrations using the Logic Builder. What it does is, this eliminates the need to write extensive code for logic implementation.
Now let’s get into making the price calculator application using DronaHQ Studio:
To make the UI layout, we will use controls provided by DronaHQ Studio. In DronaHQ, "controls" refer to the user interface elements or widgets that we will use to build the frontend of our low-code application.
UI controls for your pricing calculator
Some common controls that we are gonna use to make our application are:
Container: We use the Container control to arrange our controls in a simple and easy-to-navigate layout, in short it works as a Div tag of HTML.
Text: The Text control as its name suggests lets us add text to our UI.
Tabs: The Tabs control is a Selection control used to provide us a way to easily implement in-page tabs. We’ll use this control to make Monthly and Yearly options to show respective pages on choice.
ShortCard: We use the ShortCard control as a selection tool here. It provides us cards that are basically designed to provide the tabulated data in layouts as per the usage. We will later put onClick functions to add functionality to it.
Quantity: The Quantity control is an Advance control that is used to enter the quantity and can be used where the user has to specify the number of certain products or other elements. So we use this control as it provides us a way to get a value of the number of plans a user selects.
CheckBox: The Checkboxes control is used to select one or more options from the given list of choices. We use this control to select the addons we have in our plan.
Action Button: The Action Button control lets us trigger specific events. It works just like a normal HTML button would work.
These were all the major controls that we used to make a layout UI of our low-code application.
The applications look like this once we use all the necessary controls to make the UI. All that’s left is to add functionality to it.
To add functionality to our low-code application we can use two major options provided in the DronaHQ Studio - Rules and event Action feature.
Crafting dynamic pricing with action flows
Action Flows in DronaHQ are a front-end logic builder that allows us to visually build custom actions on the screen. These actions can be triggered by user interactions, such as button clicks, and can perform tasks like push notifications, event triggering, and updating the database.
Actions are executed on the client's device or web application. This means that the actions you define in an action flow are carried out immediately when the user performs the triggering action, without needing to communicate with the server.
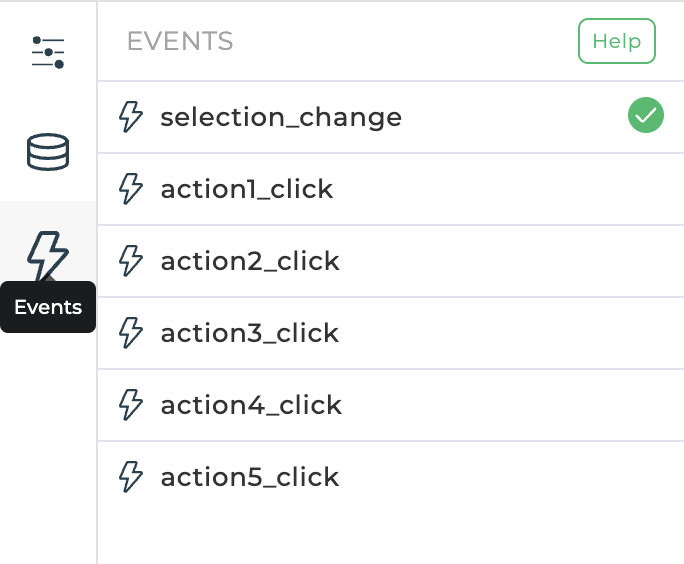
To add an action, click on the control you want to add an action, click on events and select what trigger you want to run the action. For us, it is a selection_change in this case.
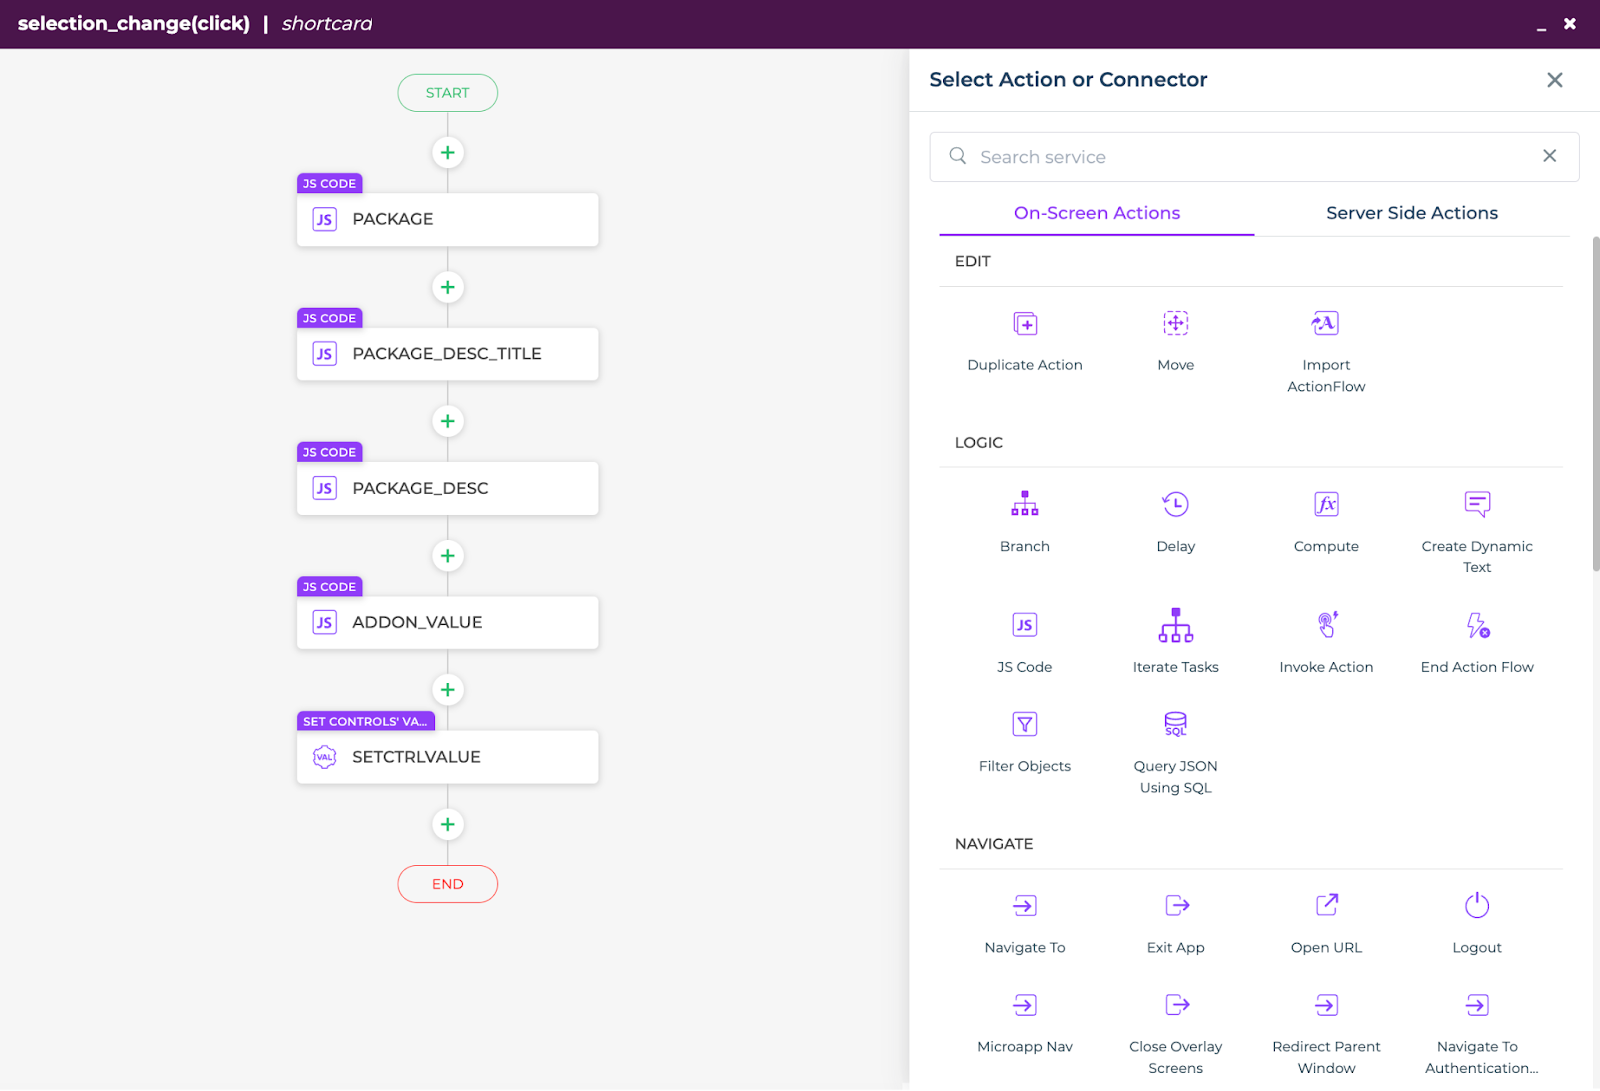
From here, we can add a set of Action flow events.
We will be using the JS Code option to add custom JS code to our controls and get the desired output.
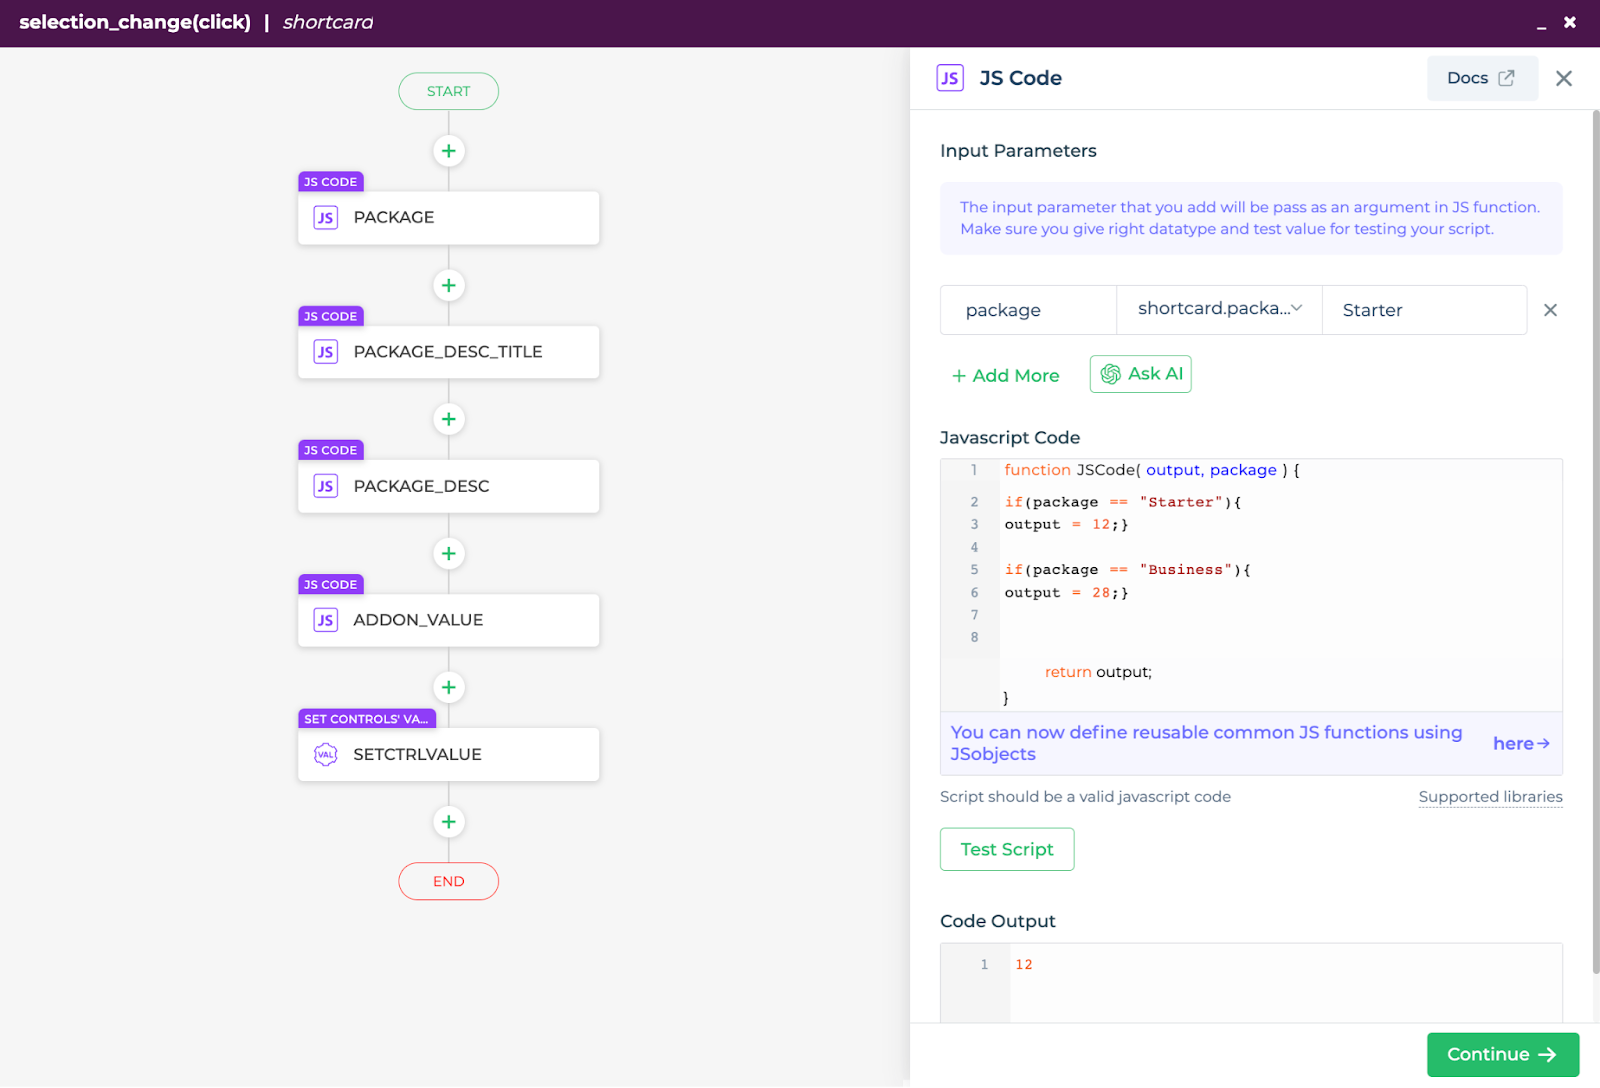
As seen in the above picture, we can add custom JS code to add functionalities to our app.
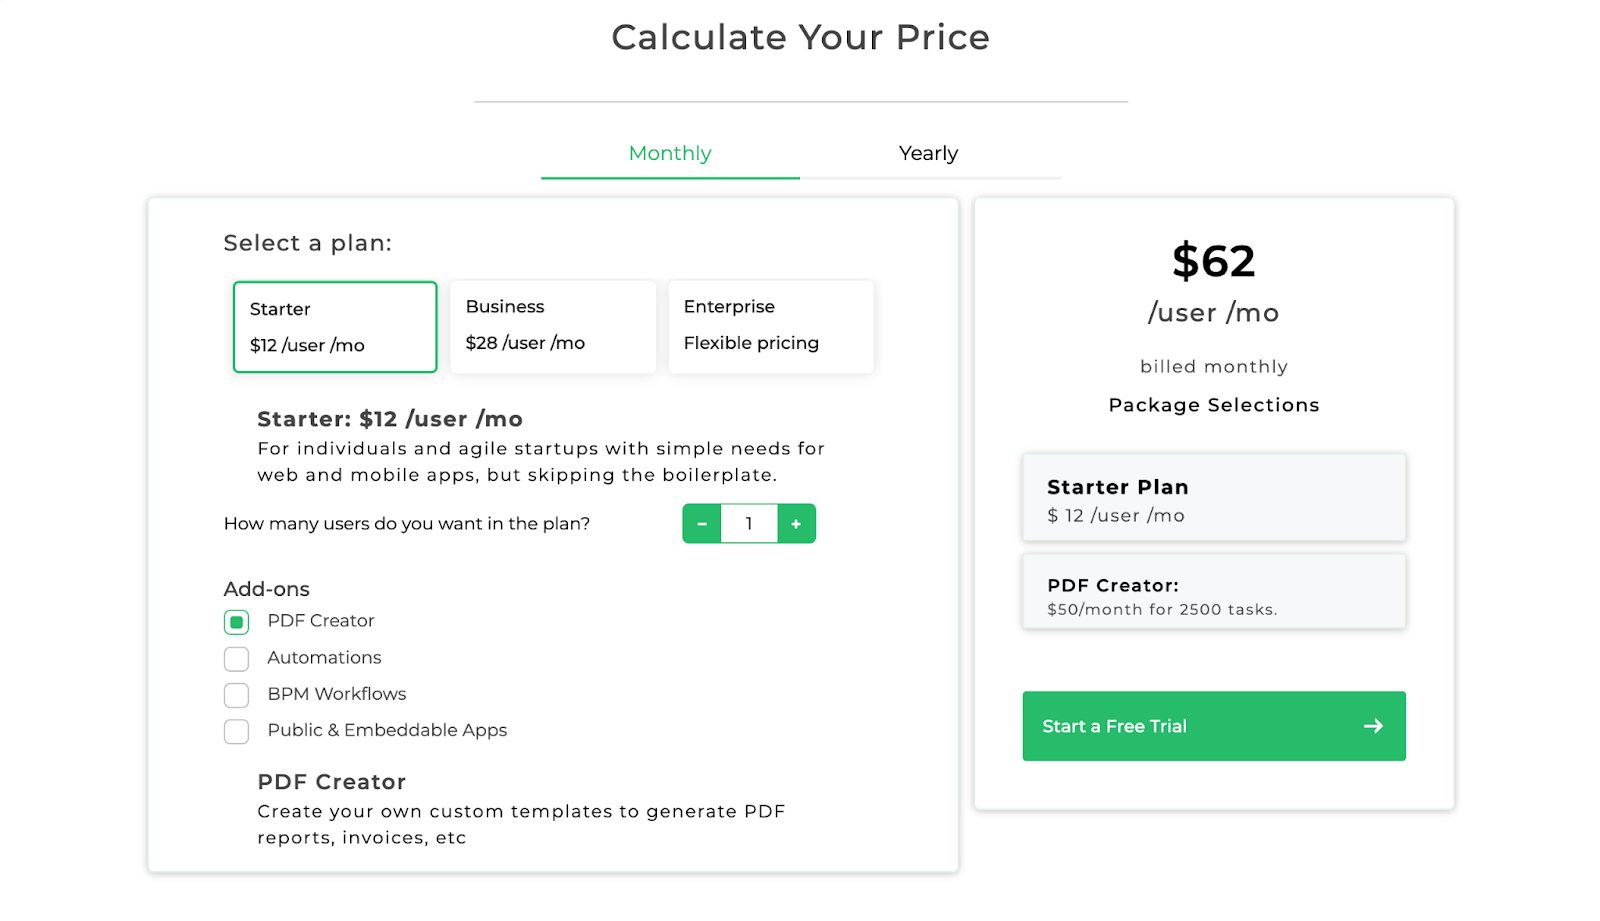
What I did here is that I made an if-else statement that provides me with a value as output as per the selection made by the user i.e. if the user selects Starter pack then the price for it is $12 but for Business it is $28. Like this I have added multiple custom JS Code to our app.
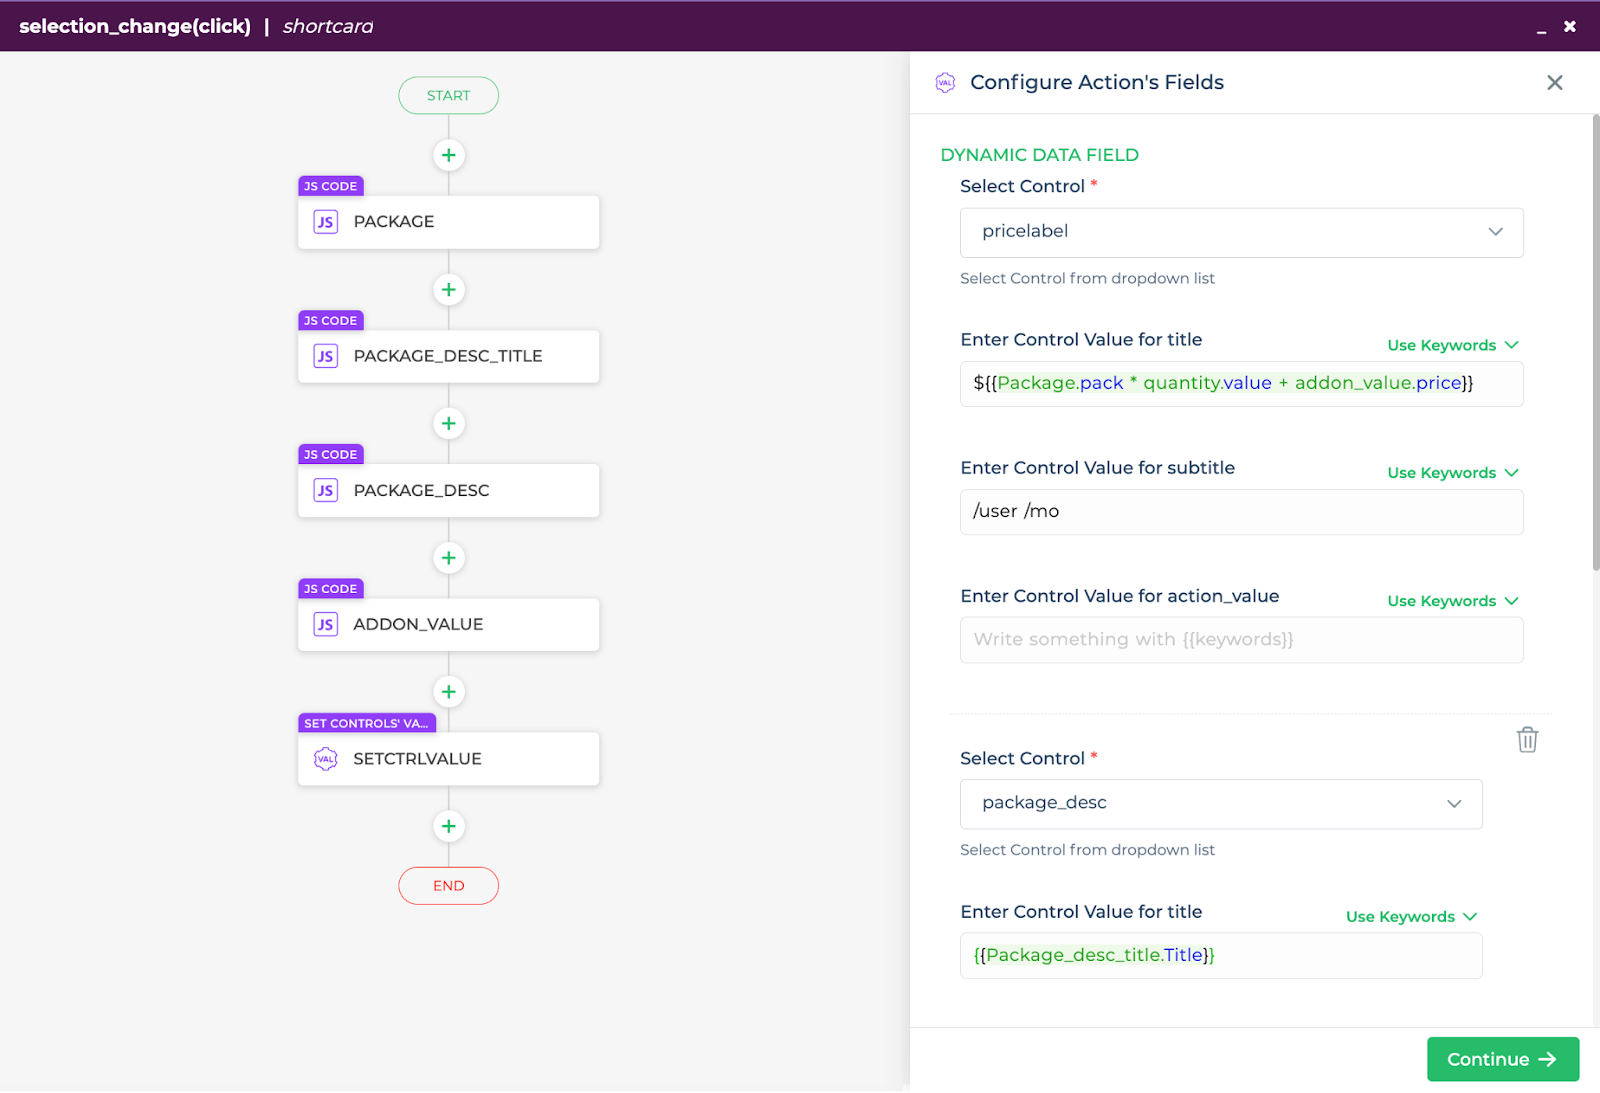
Once we get the desired dynamic outputs from our JS Code, we have to use the Set Control Value.
As the name suggests the Set Controls Value enables us to dynamically set the value of the selected controls. We can also assign values to multiple controls that we’ll do in the application.
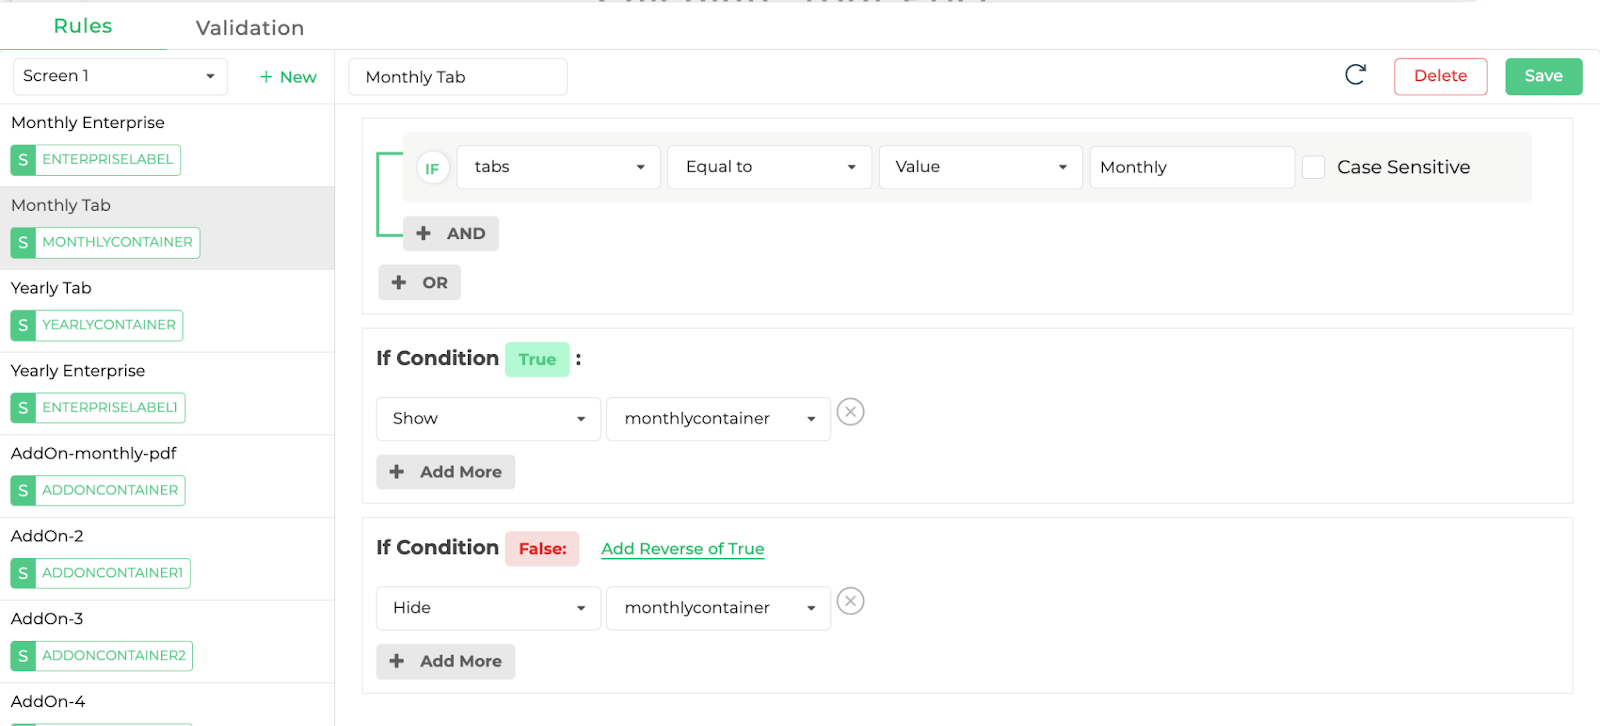
Implementing rules & validations for a robust pricing calculator
To add the Rules, We need to select the Rules option from the sidebar menu of our app. Rules are applied at the control level. we need to make sure that we choose the correct screen that we want to apply the rules to. Once we select the screen, one can assign as many conditions as you want to the different fields.
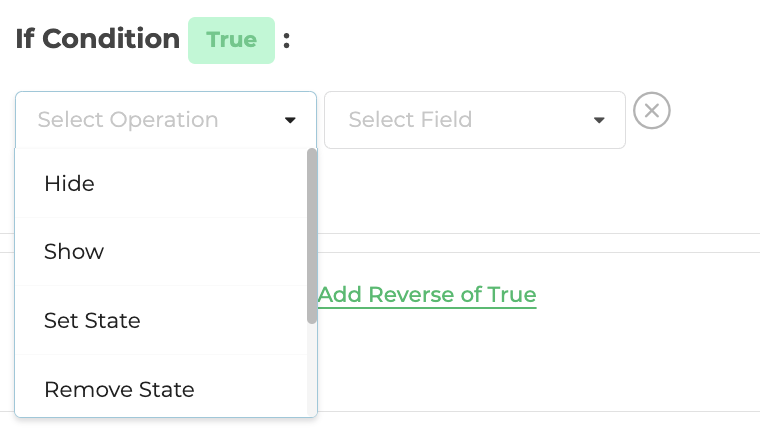
Once a new Rule is made, we can now define the IF condition for the field and provide the operation to be done if the condition is True and the operation to be done if the condition is False.
The Rule Operations available are as follows:
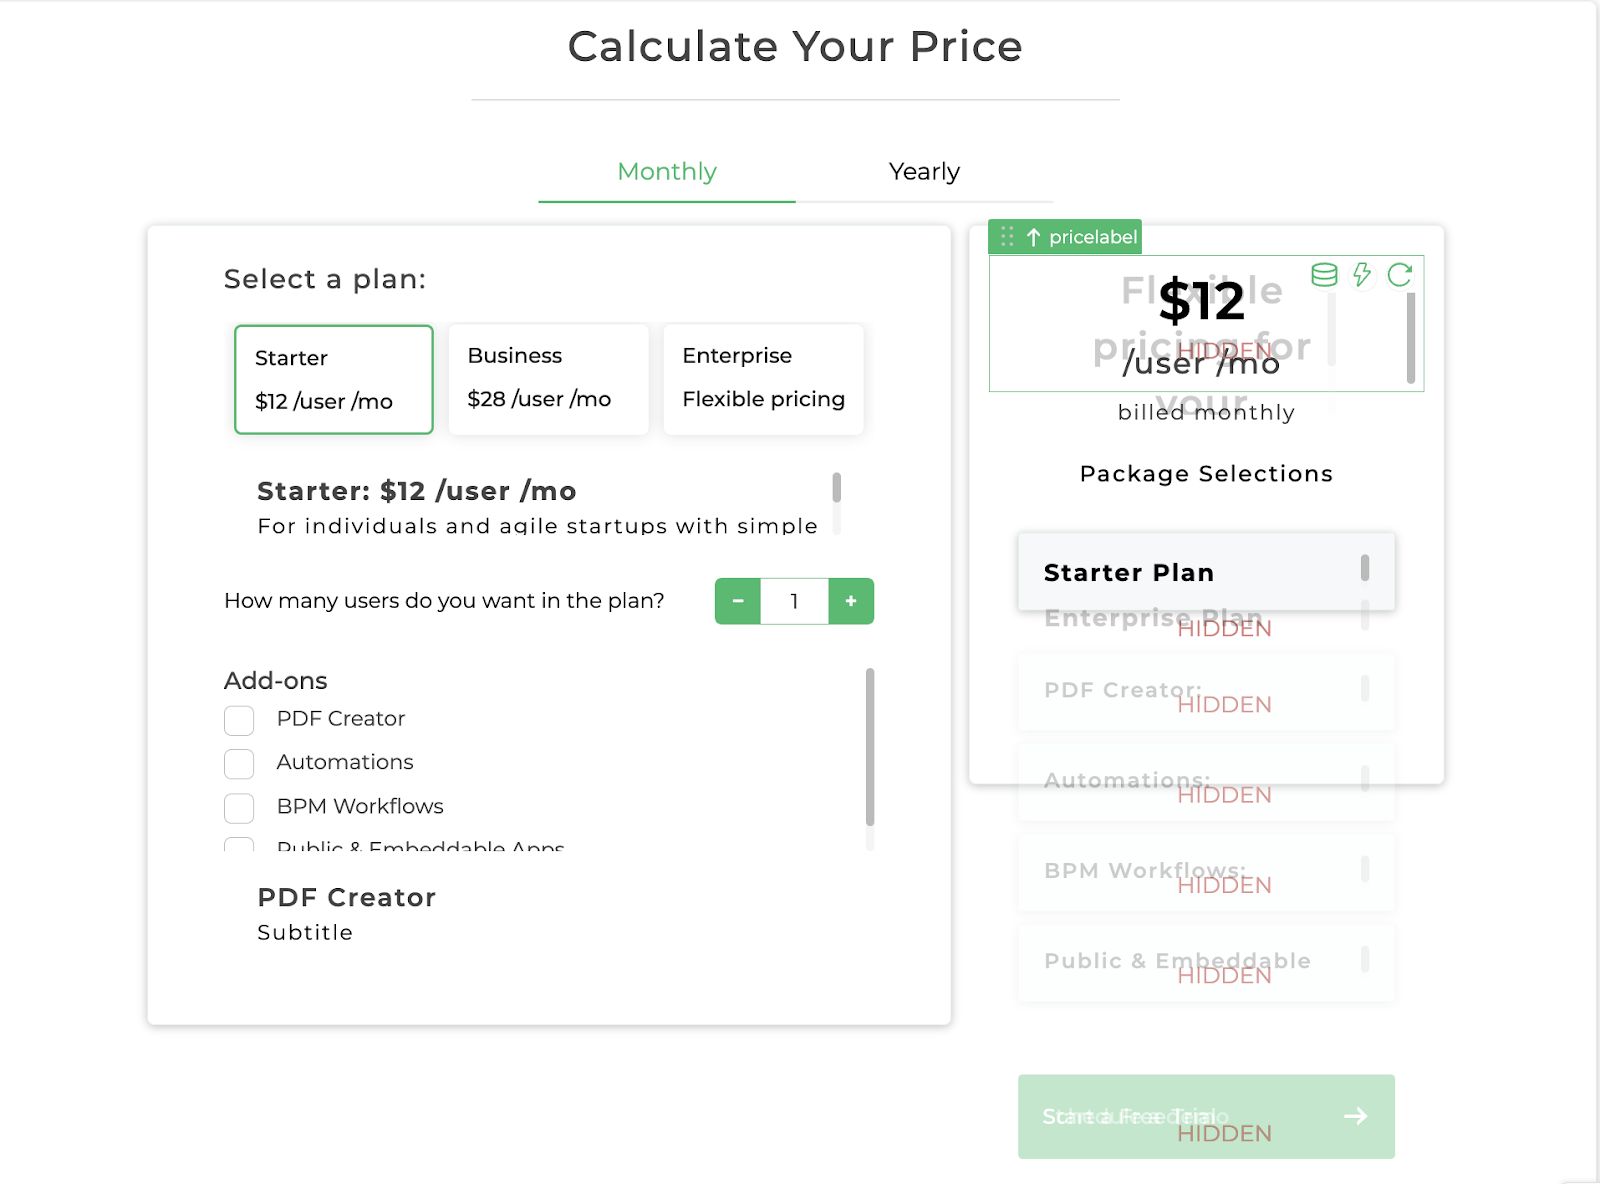
Hide: This hides a field or control from the screen.
Show: This shows the hidden control from the screen.
Set State: This allows one to set the state of controls like the Vertical steps control.
Remove State: This allows us to remove a particular state set for the controls like the Vertical steps control.
Set Property: This allows setting the property as Required or Read only for the selected control on the screen.
Remove Property: This allows to remove the property set as Required or Read only for the selected control on the screen.
To make our Tabs control work. We make a rule that if in the Tabs Control, if Monthly tab is selected then it should Show it’s respective Container or should Hide it if Monthly Tab is not selected or some other option is selected.
So Actions and Rules can thus be used for ensuring the correct functioning of the application.
After adding the rules and making sure the Actions are working, our Pricing Calculator is ready and we can Preview it to ensure how the application looks and works before publishing it.
Publishing your pricing calculator app
To Publish the application, use the Publish button and add the data require
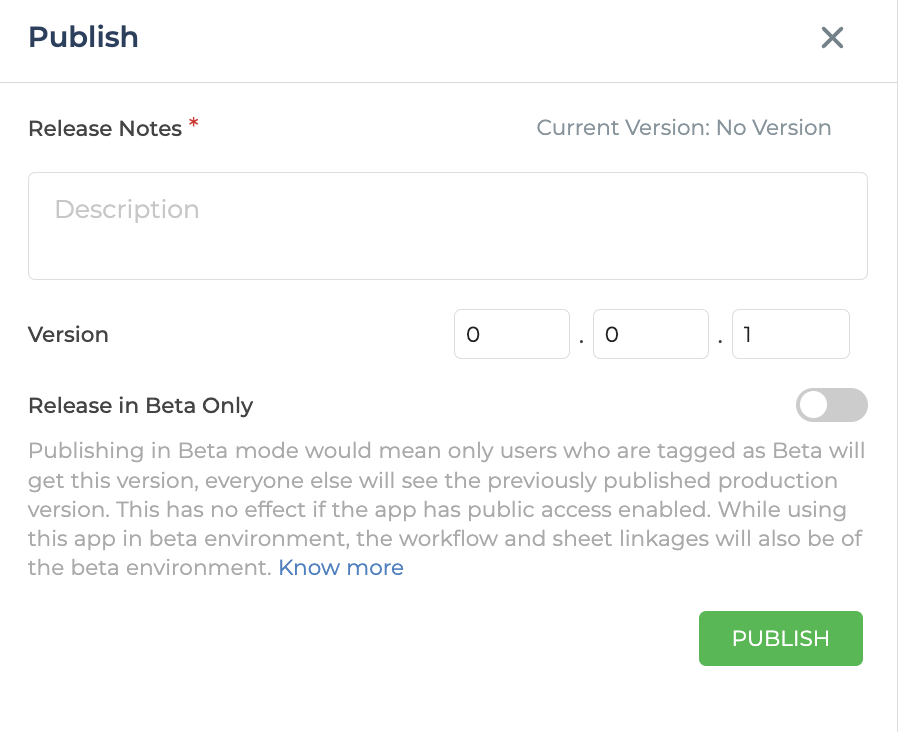
We can add Release Notes and define a version to our application while publishing it or select to release it in Beta version only.
After Publishing our application, if we want to add it to an existing application, we can get the embed code for it too. For that let’s go to share and select Embed configurations.
After selecting Embed configurations, we can choose what type of embed we want.
It can be a URL, QR Code, IFrame to add to your existing application or a Js code and many more available options.

Here’s the IFrame embed link to the application I made.
<iframe class="studio-embed" src="crm.dronahq.io/OsBglwwojIPXBoaYEOV9HjQEwetN.." frameborder="0" style="background: transparent; " width="100%" height="533" ></iframe>
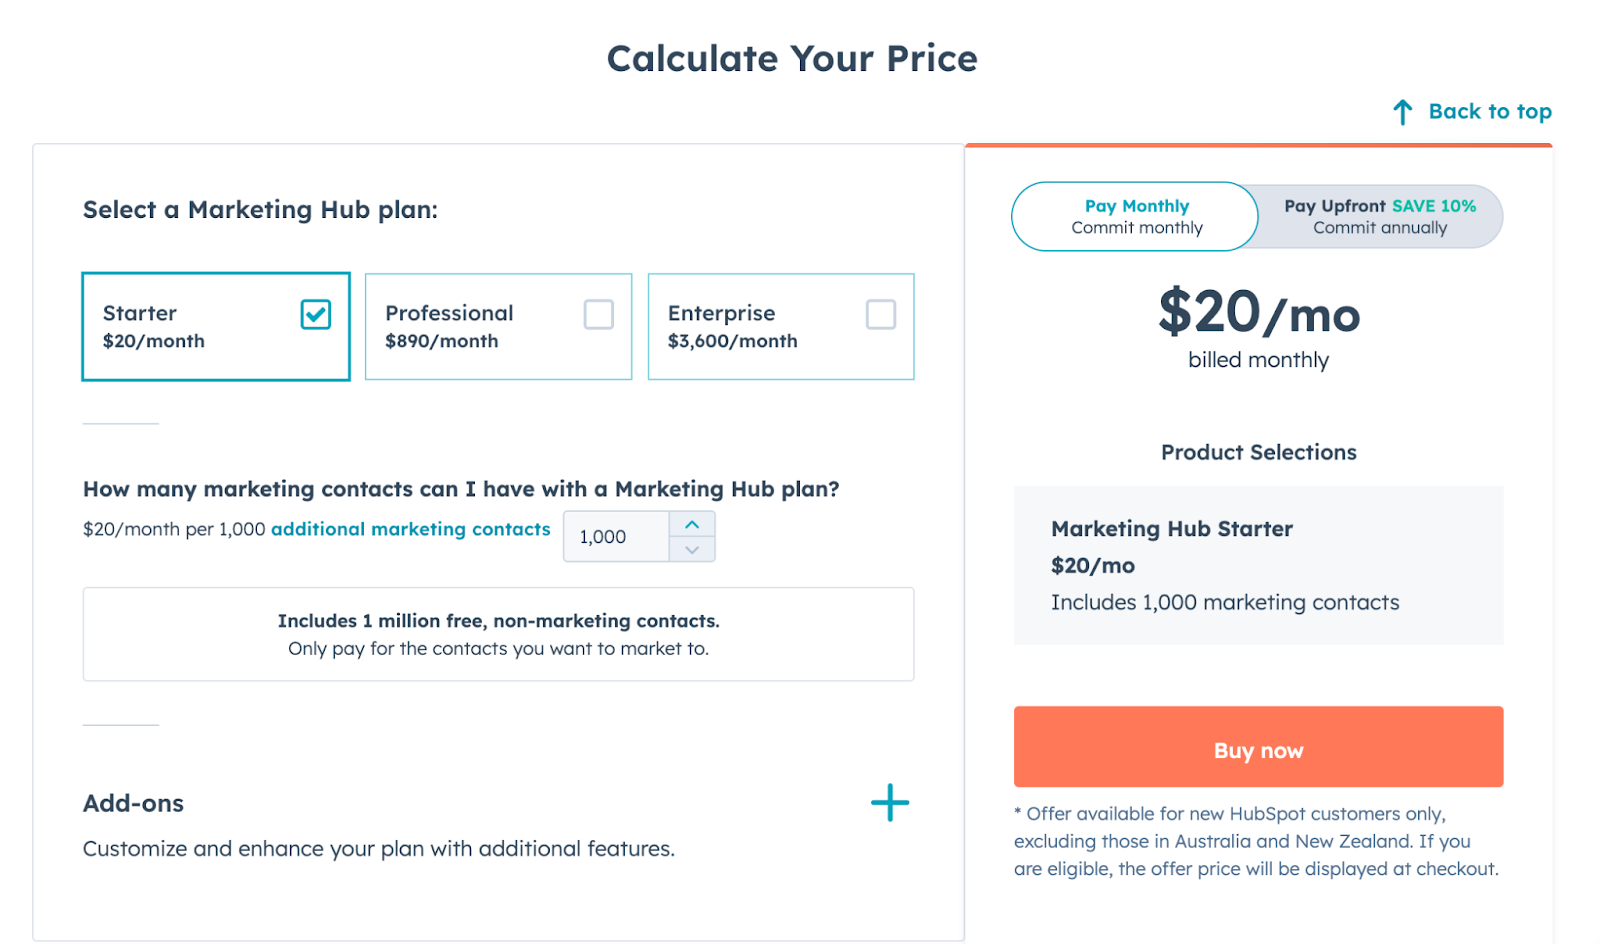
I took inspiration for our UI from Hubspot’s Price calculator section.
But you can look at more pricing sections of other companies and take inspiration. Adding some of those below for reference.
Digital Ocean service Calculator https://www.digitalocean.com/pricing/calculator
Github Enterprise plan Calculator https://github.com/pricing/calculator
Databricks workloads pricing Calculator https://www.databricks.com/product/pricing/product-pricing/instance-types
Mailchimp Pricing https://mailchimp.com/pricing/marketing/?currency=USD
There are multiple more websites where you can find templates or UI to follow such as Dribble, Uizard, ThemeForest, and many more.
So that was all about how I made a Price Calculator Application using DronaHQ - a Low Code Tool.
Get started building more such operational and internal tools using DronaHQ